Sending HTML emails with PHP
Learn how to send HTML emails with PHP, PHPMailer, Mailtrap and Outlook

Developer focusing on JavaScript and PHP. Writing tech articles and sharing tips and tutorials on web and mobile development.
In this article I will show you the process of sending an email with PHP and PHPMailer.
Prerequisites: have PHP and Composer installed on your machine.
PHP has built-in support for sending emails with mail()
function. It allows you to send emails straight from the script and it can come in handy when you need to send a simple email.
Let's create mail.php file and write some code.
<?php

// email body
$body = "Hi, this is my first PHP email. Nice to talk to you!";
// subject
$subject = "This email is send with PHP";

// receiver email
$receiver = "friend@example.com";

// send it
mail($receiver, $subject, $body);
This code will work only if you have purchased a hosting package and you are sending your email from a real server.
Otherwise, if you are using your local environment, this piece of code won't do anything since we didn't setup the required configuration. If you are using XAMPP, you can edit some values inside php.ini and sendmail.ini files. But since that's beyond the scope of this tutorial, I will not go into it now.
In order to send an email, we have to utilize SMTP, which is basically a message transfer agent (MTA) that moves your message across the internet to its receiver. Besides that, there are some other tools that can be used to send an email quickly. For the purpose of this tutorial, I will be using Mailtrap for testing, Outlook as an SMTP provider and PHPMailer which is a safe and secure PHP email library.
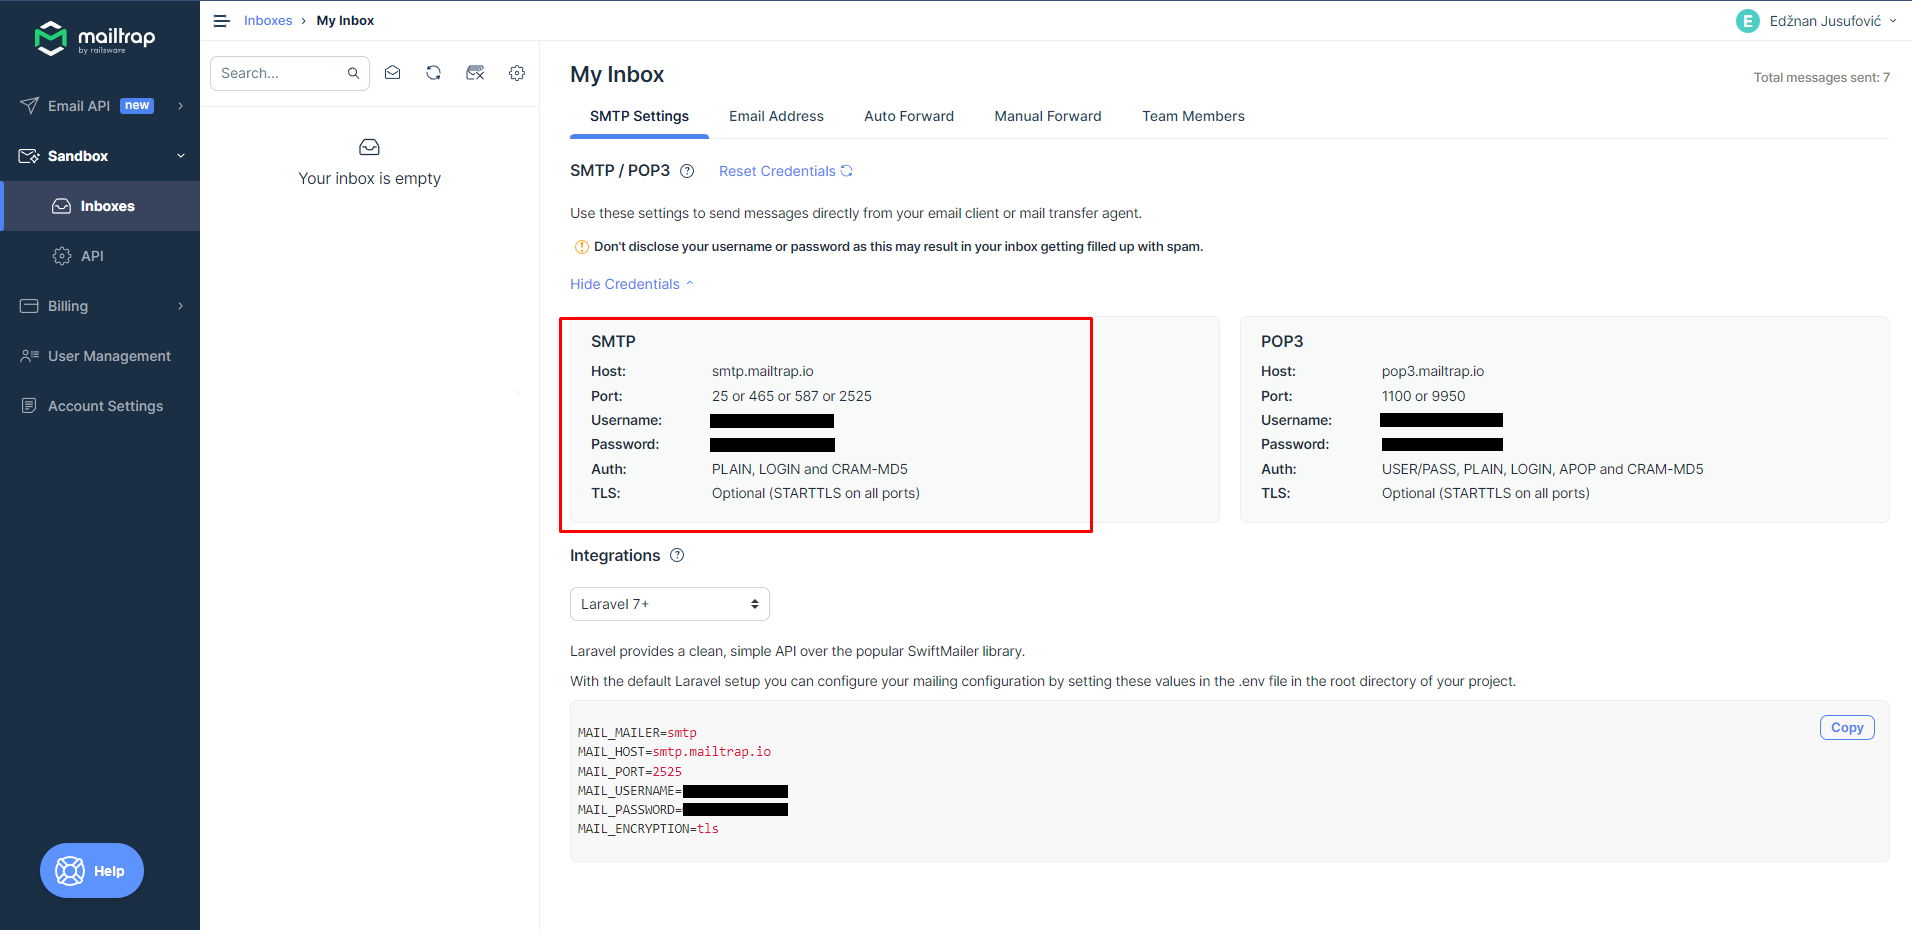
Mailtrap setup
Mailtrap is an email testing tool that provides many functionalities like email inbox, debugging, auto forwarding, cooperating with your team members, etc.
After we are done setting up out Mailtrap account we can navigate to Inboxes. In the SMTP Settings tab we can find our SMTP details that we are going to use to add those details to our code.
Configure PHPMailer
Now let's install PHPMailer.
composer require phpmailer/phpmailer
Now we can change our mail.php file replace the previos PHP code with a new one that is powered by PHPMailer.
<?php
use PHPMailer\PHPMailer\PHPMailer;
use PHPMailer\PHPMailer\Exception;
use PHPMailer\PHPMailer\SMTP;
require "./vendor/autoload.php";
// initialize PHPMailer
$mail = new PHPMailer(true);
// add your SMTP credentials
$mail->isSMTP(); // configures PHPMailer to use SMTP
$mail->Host = "smtp.mailtrap.io"; // SMTP host
$mail->SMTPAuth = true; // Mailtrap requires authentication so we set this to true
$mail->Username = "YOUR USERNAME GOES HERE";
$mail->Password = "YOUR PASSWORD GOES HERE";
$mail->SMTPSecure = "tls"; // encryption is optional for Mailtrap
$mail->Port = 587; // SMTP port
// sender information
$mail->From = "me@example.com";
$mail->FromName = "John Doe";
// reply to address and name
$mail->addReplyTo("reply@example.com", "Reply");
// receiver information
$mail->addAddress("friend@example.com", "Friend Name");
// body
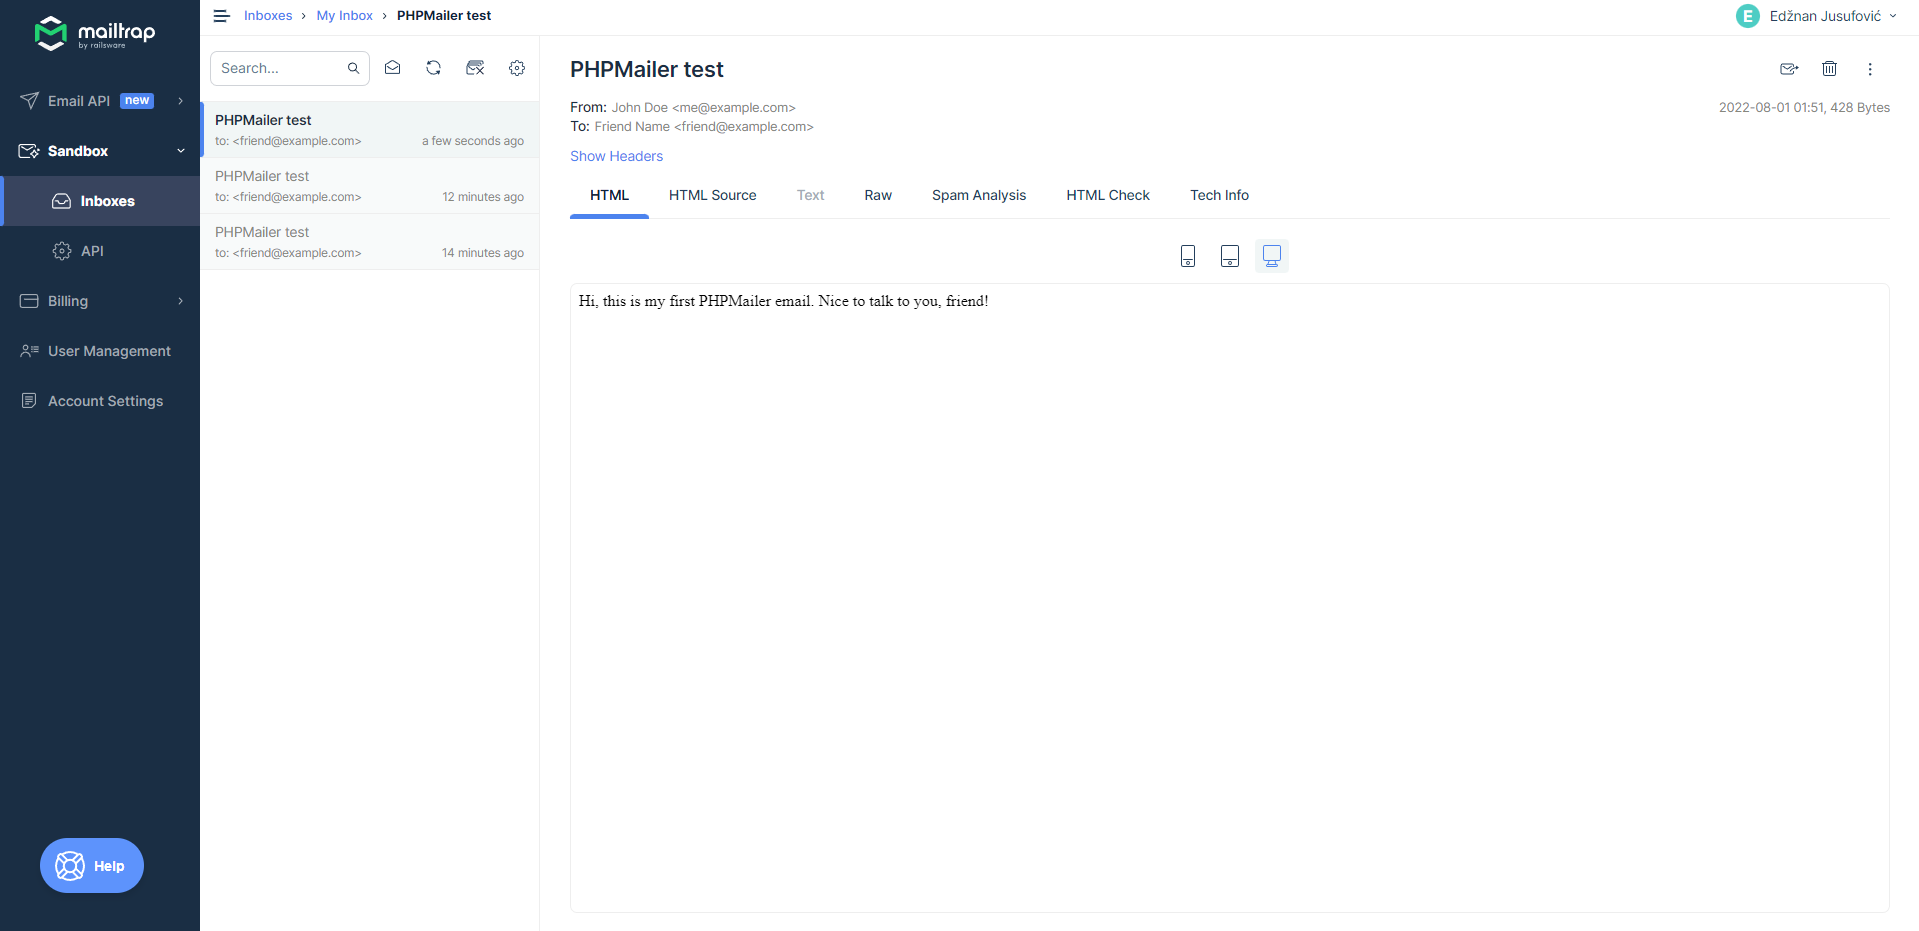
$mail->Body = "Hi, this is my first PHPMailer email. Nice to talk to you, friend!";
// subject
$mail->Subject = "PHPMailer test";
// send it as HTML email
$mail->isHTML(true);
try {
$mail->send();
echo "Email is sent successfully!";
} catch (Exception $e) {
echo "Mailer Error: " . $mail->ErrorInfo;
}
Now when we execute this file, it will send an email and we can access that email in out Mailtrap inbox.
Send an email with PHPMailer and Outlook
Now, since we have set almost everything up, we might just as well send a real email through a real email client. In this case we will use Outlook. In our PHP code we have to change a few SMTP settings. We can also set some additional information like CC, BCC and attachments. Let's head over to the code!
$mail->Host = "smtp-mail.outlook.com";
$mail->Username = "YOUR OUTLOOK EMAIL";
$mail->Password = "YOUR OUTLOOK PASSWORD";
$mail->SMTPSecure = "tls"; // Microsoft requires TLS when the port 587 is used
$mail->Port = 587;
Besides these, there are other lines of code that have to be modified in order to send an email to a real recipient. You have to pass a real email address to the $mail->addAddress() function. Also, make sure that $mail->From address matches the one that you assign to $mail->Username.
Now when you run the code, the email should be sent to the specified address.
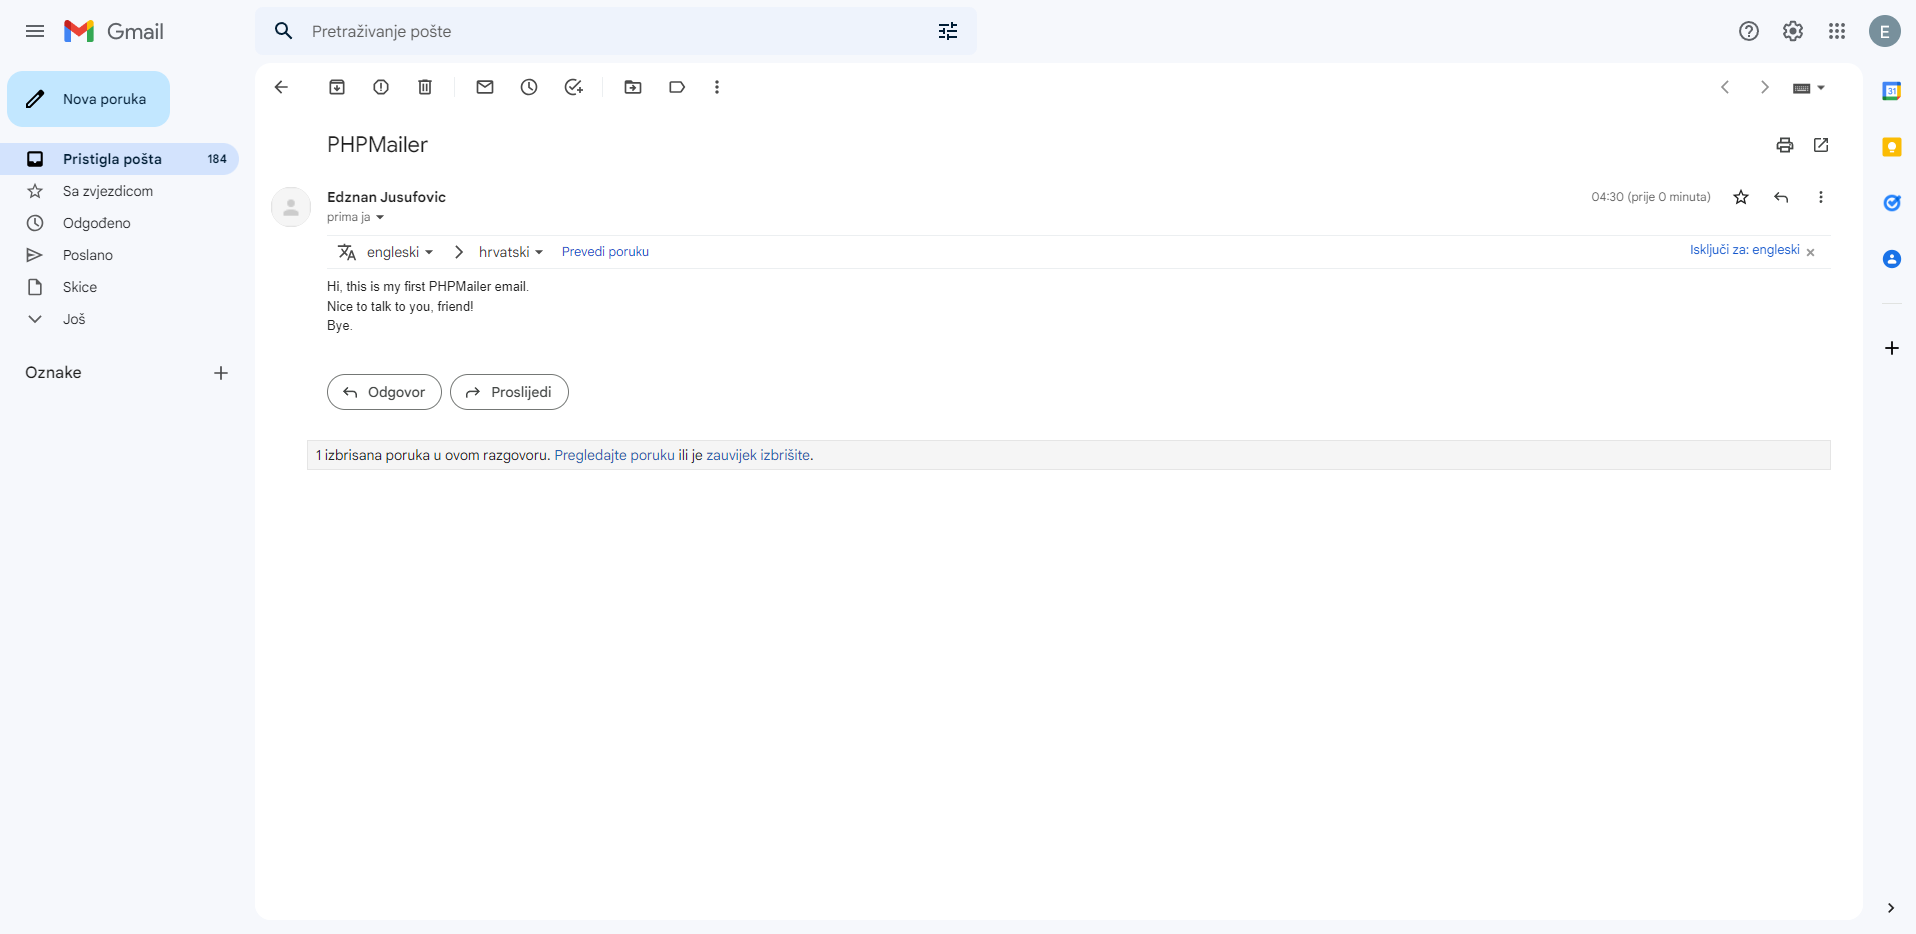
As you can see on the image above, I have received this email on my gmail account.
Conclusion
In this tutorial we have learned how to send an email with PHP and PHPMailer library. We utilized PHPMailer's ability to send emails via SMTP. We have also configured Mailtrap account and sent a test email to the inbox on Mailtrap. And at the end we configured SMTP settings to send emails to real accounts.
You can find the final version of the code on GitHub.


